Bumper
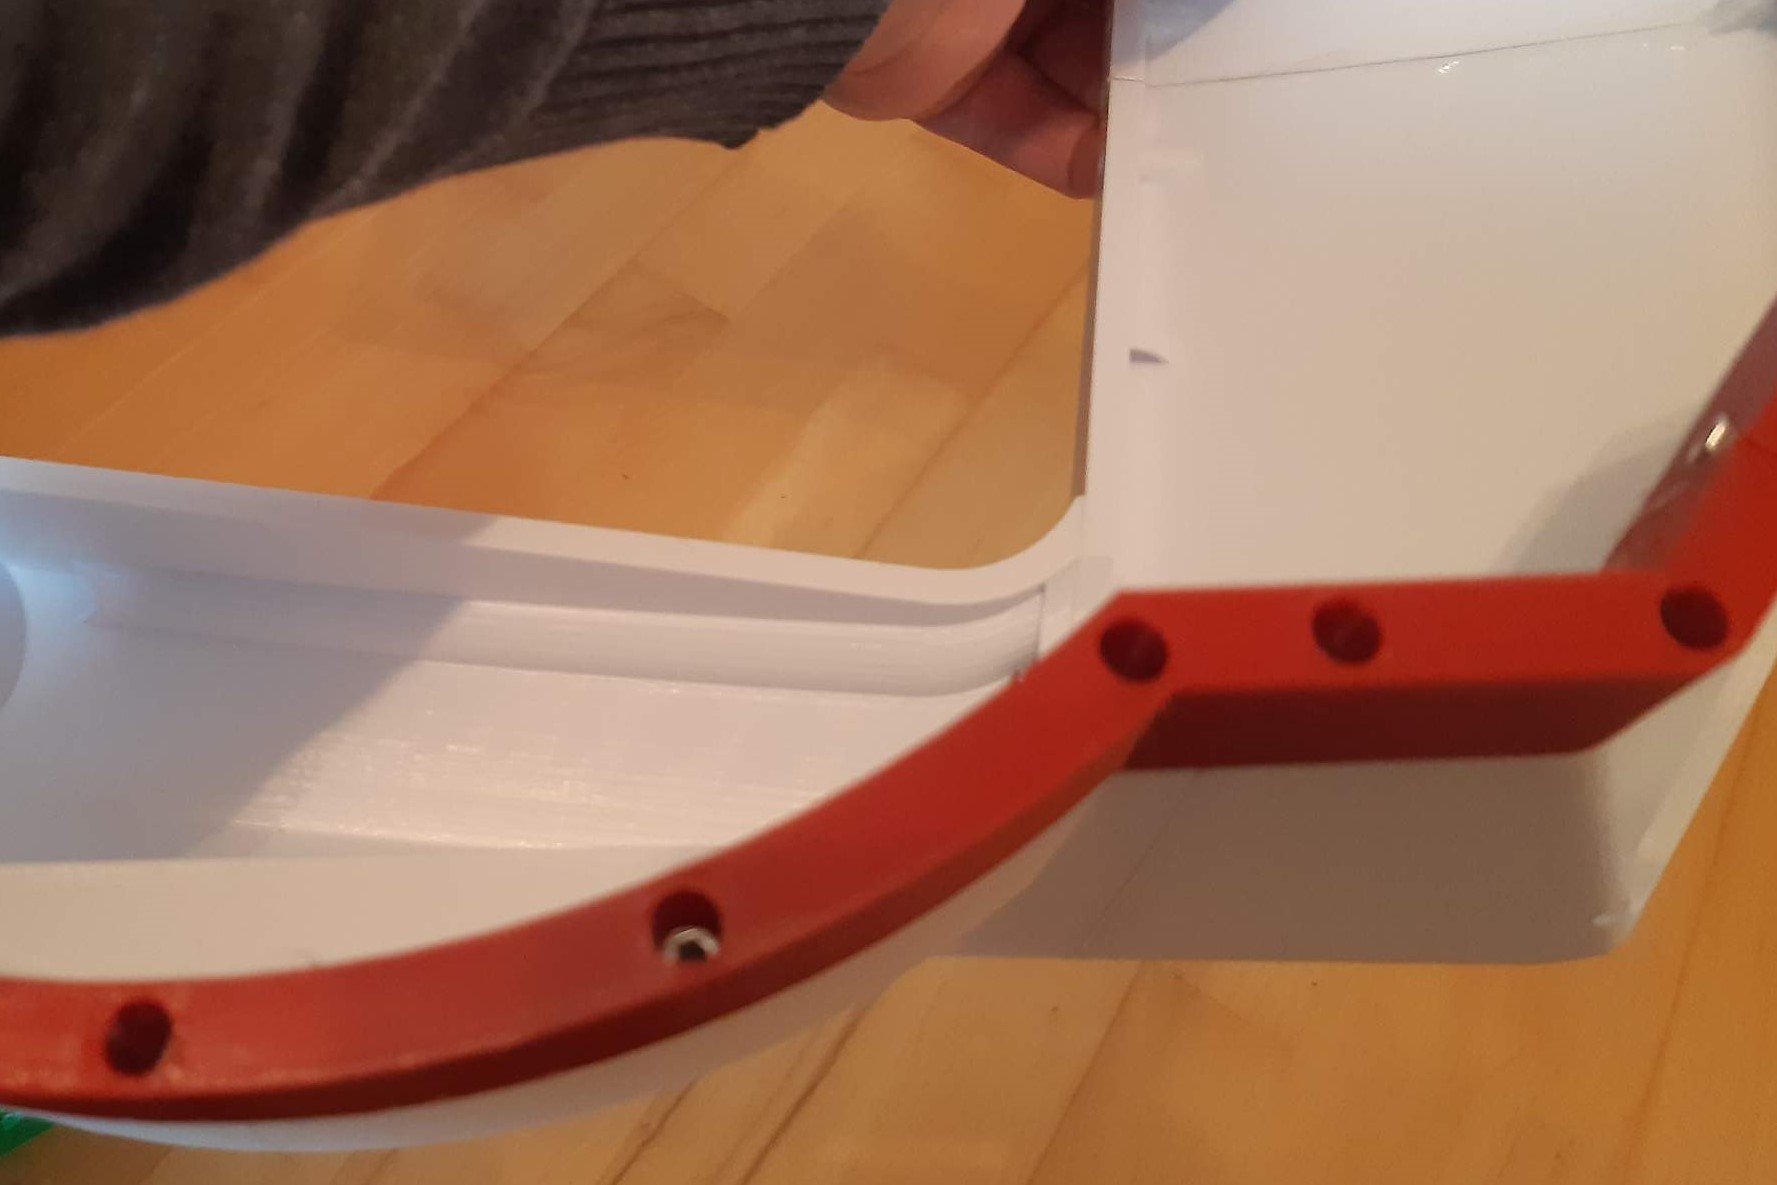
As you see in the pictures of front chassis, there are some red parts at the bottom. These three parts are named bumper and will add some rigidy to the front chassis. Also they will ensure to cover the mow disc and blades. Because they might collid with stones, ground or similar, they will wear down by time. Therefore, I designed them as separate parts, so it is easy to replace them.
To attach the bumper, you first need to insert some M3 knurled brass nuts. You already did this for lower chassis so you should be familiar with this step. You need 22 of them in total
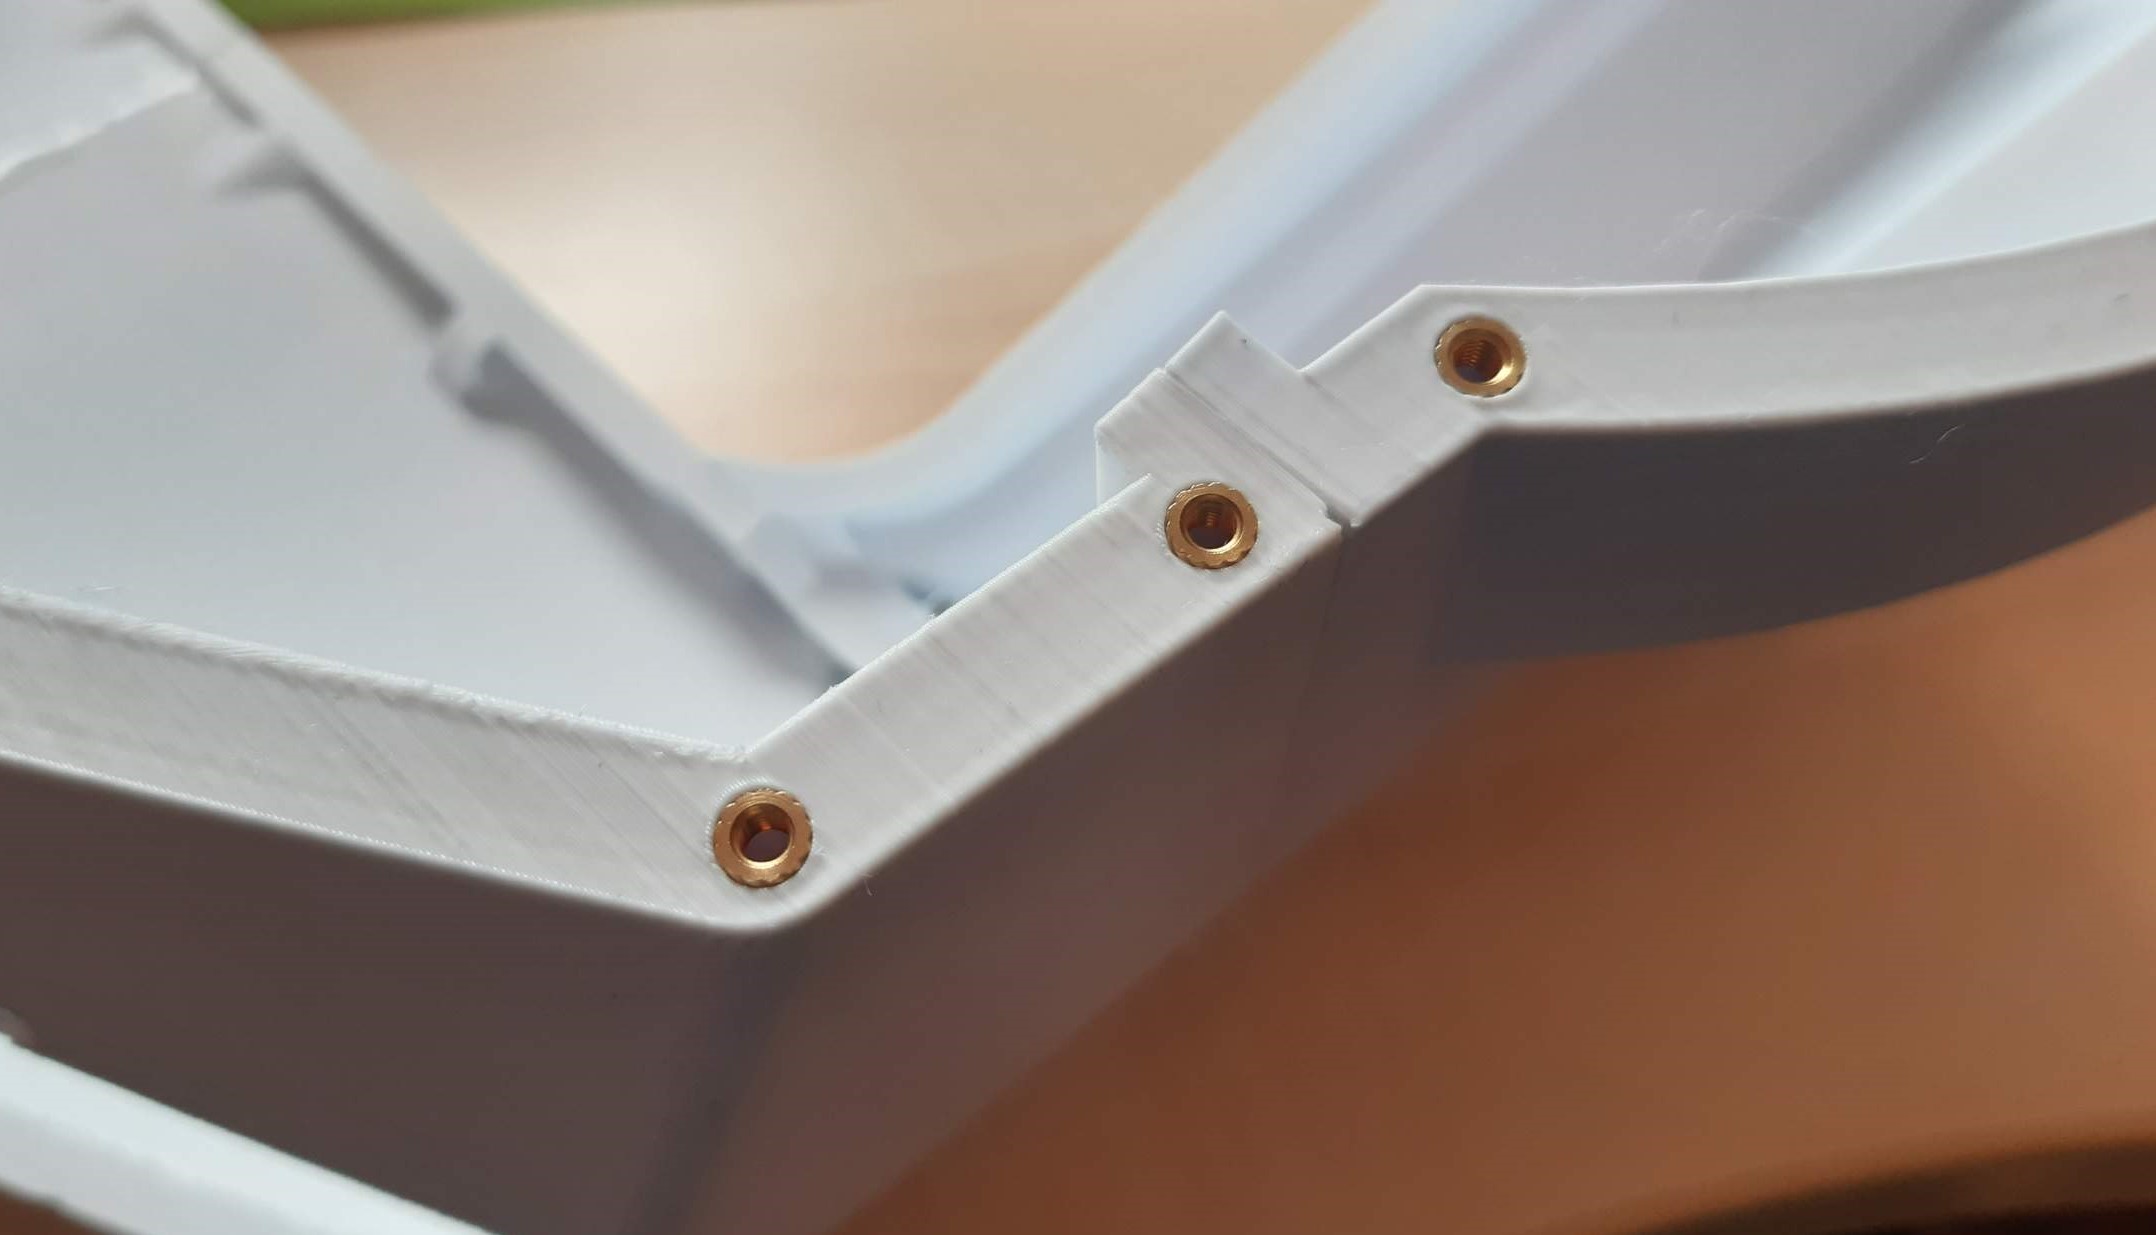
Now, simple screw the three bumper parts to front cover by using some M3x15 screws, again 22 in total. You can also use two M3x10 counter sunk screws and nuts to combine the bumper parts to one structural unit.
Congratulations
Your front cover should look like this when finalized. 
Special notes
Have a close look to the inner side of the front cover. On both sides, there are some kind of tunnel. These are cable guides. So route all your cables through them.
Right now, I’n not sure if I place charging contacts to the rear mounting points of front cover or to the nose. To keep options possible, you find a small hole right beneath the rear mounting points. You can route one cable through each of them. This way, you can place charging contact VCC and GND to one of each mounting point. If you want to attach them to nose, you find some pre-drilled holes at the inner side of the nose parts. Just complete the holes by using your drill and place your contacts here.