How to mount mow motors
As you’ve seen in previous steps, HoverMower is able to take up to two mow motors. I use brushless motors from JKONG MOTOR but it is up to you to use any motor you want. You might need to adjust the part “Mow_motor_pod” to your needs. These 3D files are used. The quantity depends on the count of motors you want to use:
- Mow_motor_lid (if you want to install only one motor)
- Mow_motor_holder_1
- Mow_motor_clamp
- Mow_motor_holder_2
- Mow_motor_pod
Look at the cut view here to see, how the parts gets arranged. 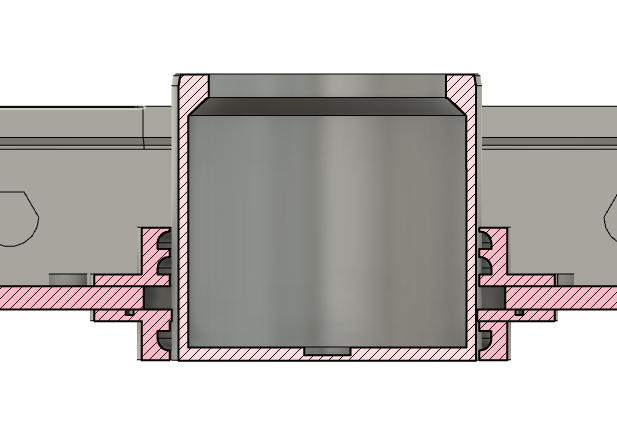
Use the Mow motor lid to close any cutout you don’t want to place a motor. As a sealing, O-Ring with 100mm inner diameter and 2mm thickness is used. Just place it into the groove before mount.
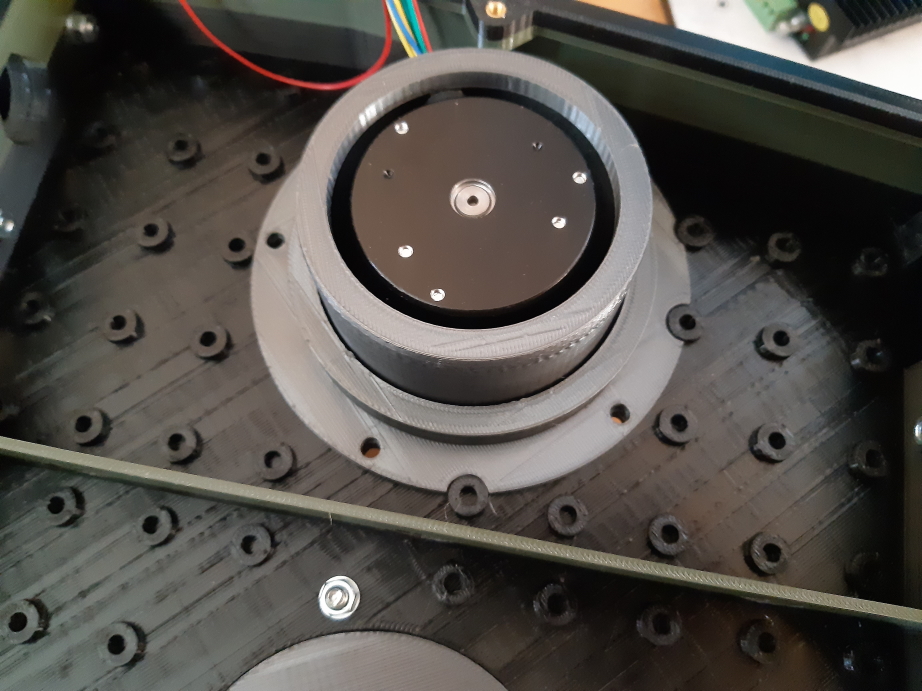
The same is true if you install a motor. In this case, put the O-Ring into the groove of Mow motor_holder 1 like shown here 
Now place O-Ring 80mm ID, 4mm thickness into Mow_motor_holder_1 and attach Mow_motor_clamp with M4x14 screws and nuts 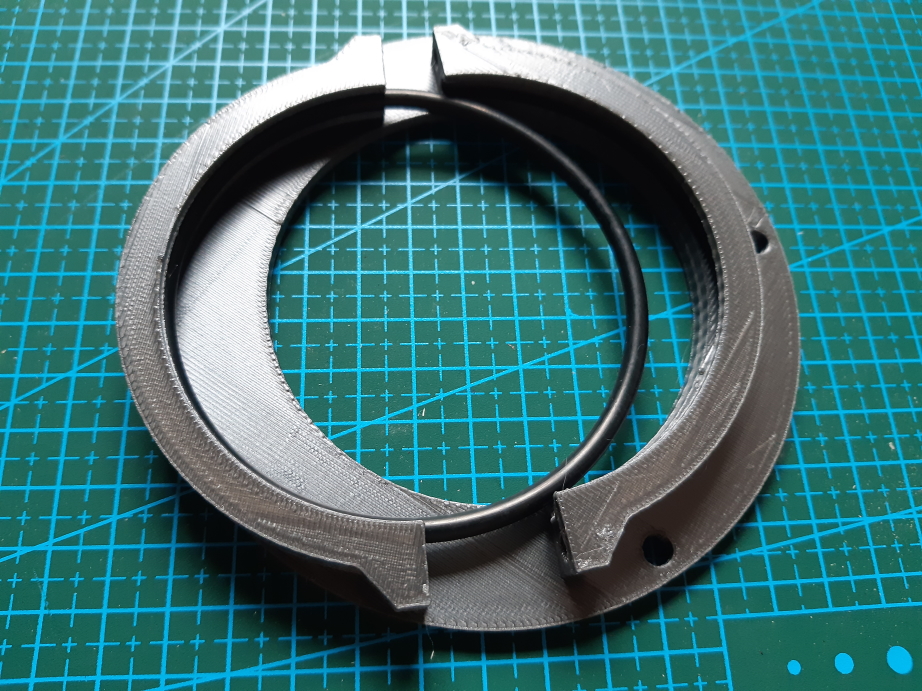 Place two additional O-Ring 80mm ID, 4mm thickness into Mow_motor_holder_2 and bold everything together with M5x20 screws, M5 washers and M5 nuts.
Insert the motor into (your individual) part Mow_motor_pod and fix it with the screws matching your motor. Slide the Mow_motor_pod through your new assembly. The O-Ring act as sealing, dampers and together with the clamp, will keep everything in place. You can adjust the cutting height by simply loose the clamp and move the Mow_motor_pod to the desired position. I’m not satisfied with this assembly and in my opinion, it needs some redesign. If you’ve any ideas, please send a PR on github.